Windows 10’s next major release is scheduled to drop sometime in October of 2018 and Microsoft has announced that there is a small problem with it. The update fails to check if the PC has enough storage space to install the update. If the PC is lacking in hard drive (or Solid State) space, the update will fail, and then try again. And fail. And then try again. And fail. Well, I think you get the picture. The biggest problem with this scenario is that you will see a poorer performance from your PC while it tries to install the update, and since it will keep trying to install, the poor performance will continue. So in this post, we’ll show you a simple way to free up Hard Drive space in Windows 10.
Free Up Space Using Storage Sense
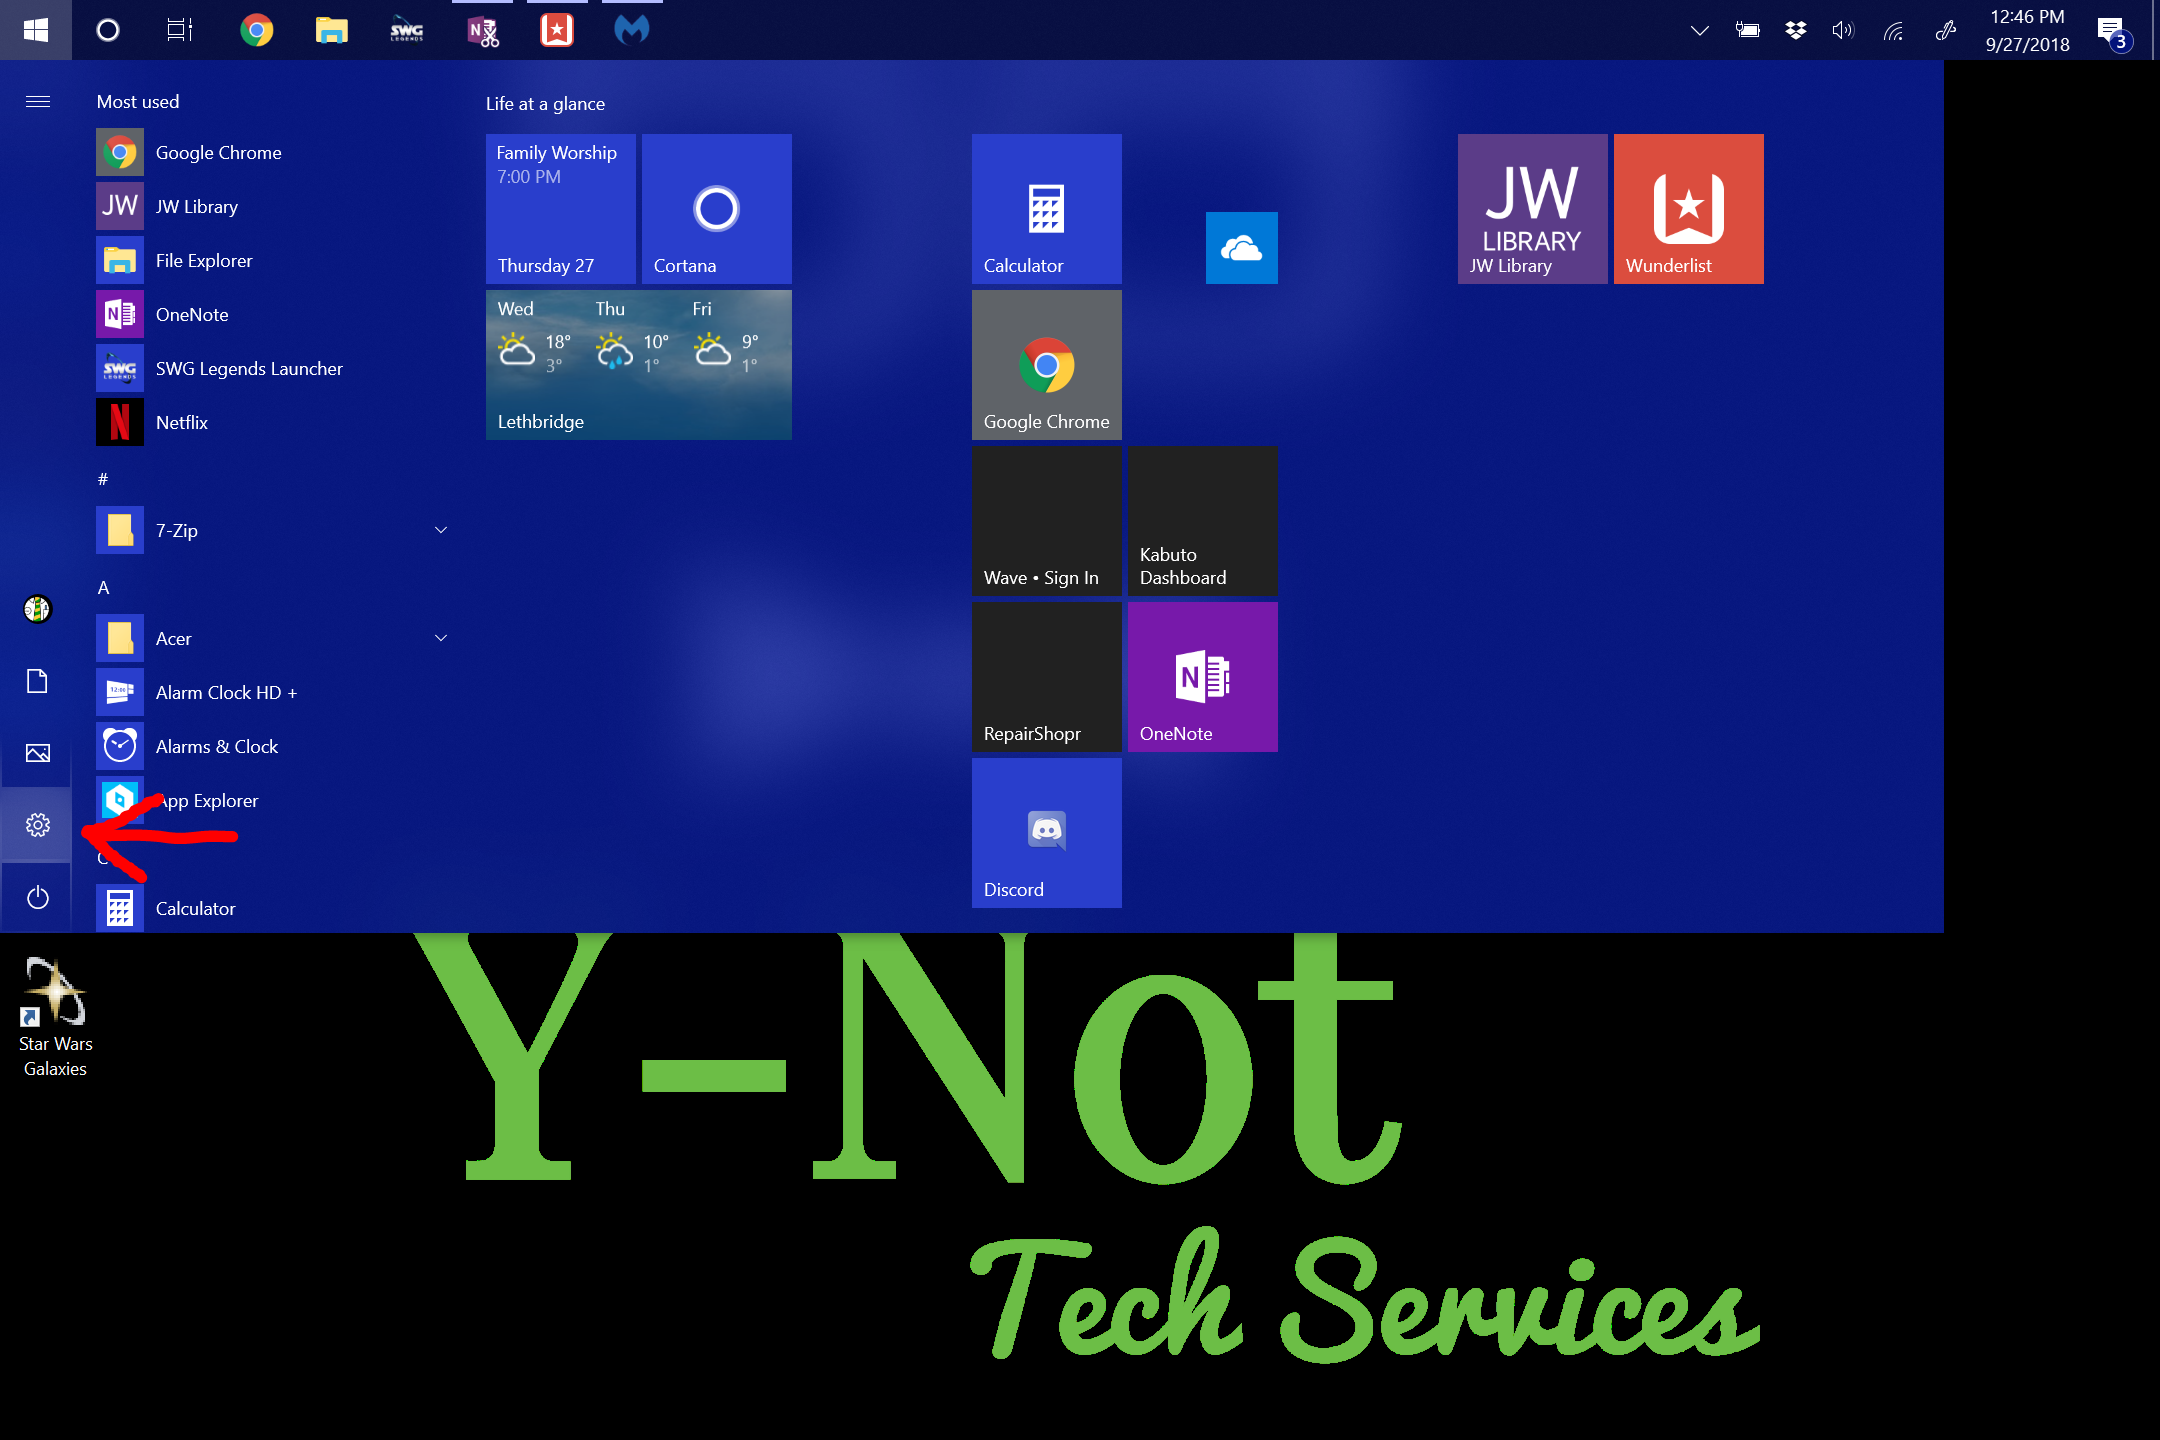
We’ll start by clicking on your Windows Start Button. Your Start Button might be in a different corner of your screen (often the bottom left-hand corner) but it should look the same. Just click on that and head to the next step.
Once you have your Start Menu Open, click on the Settings Cog.
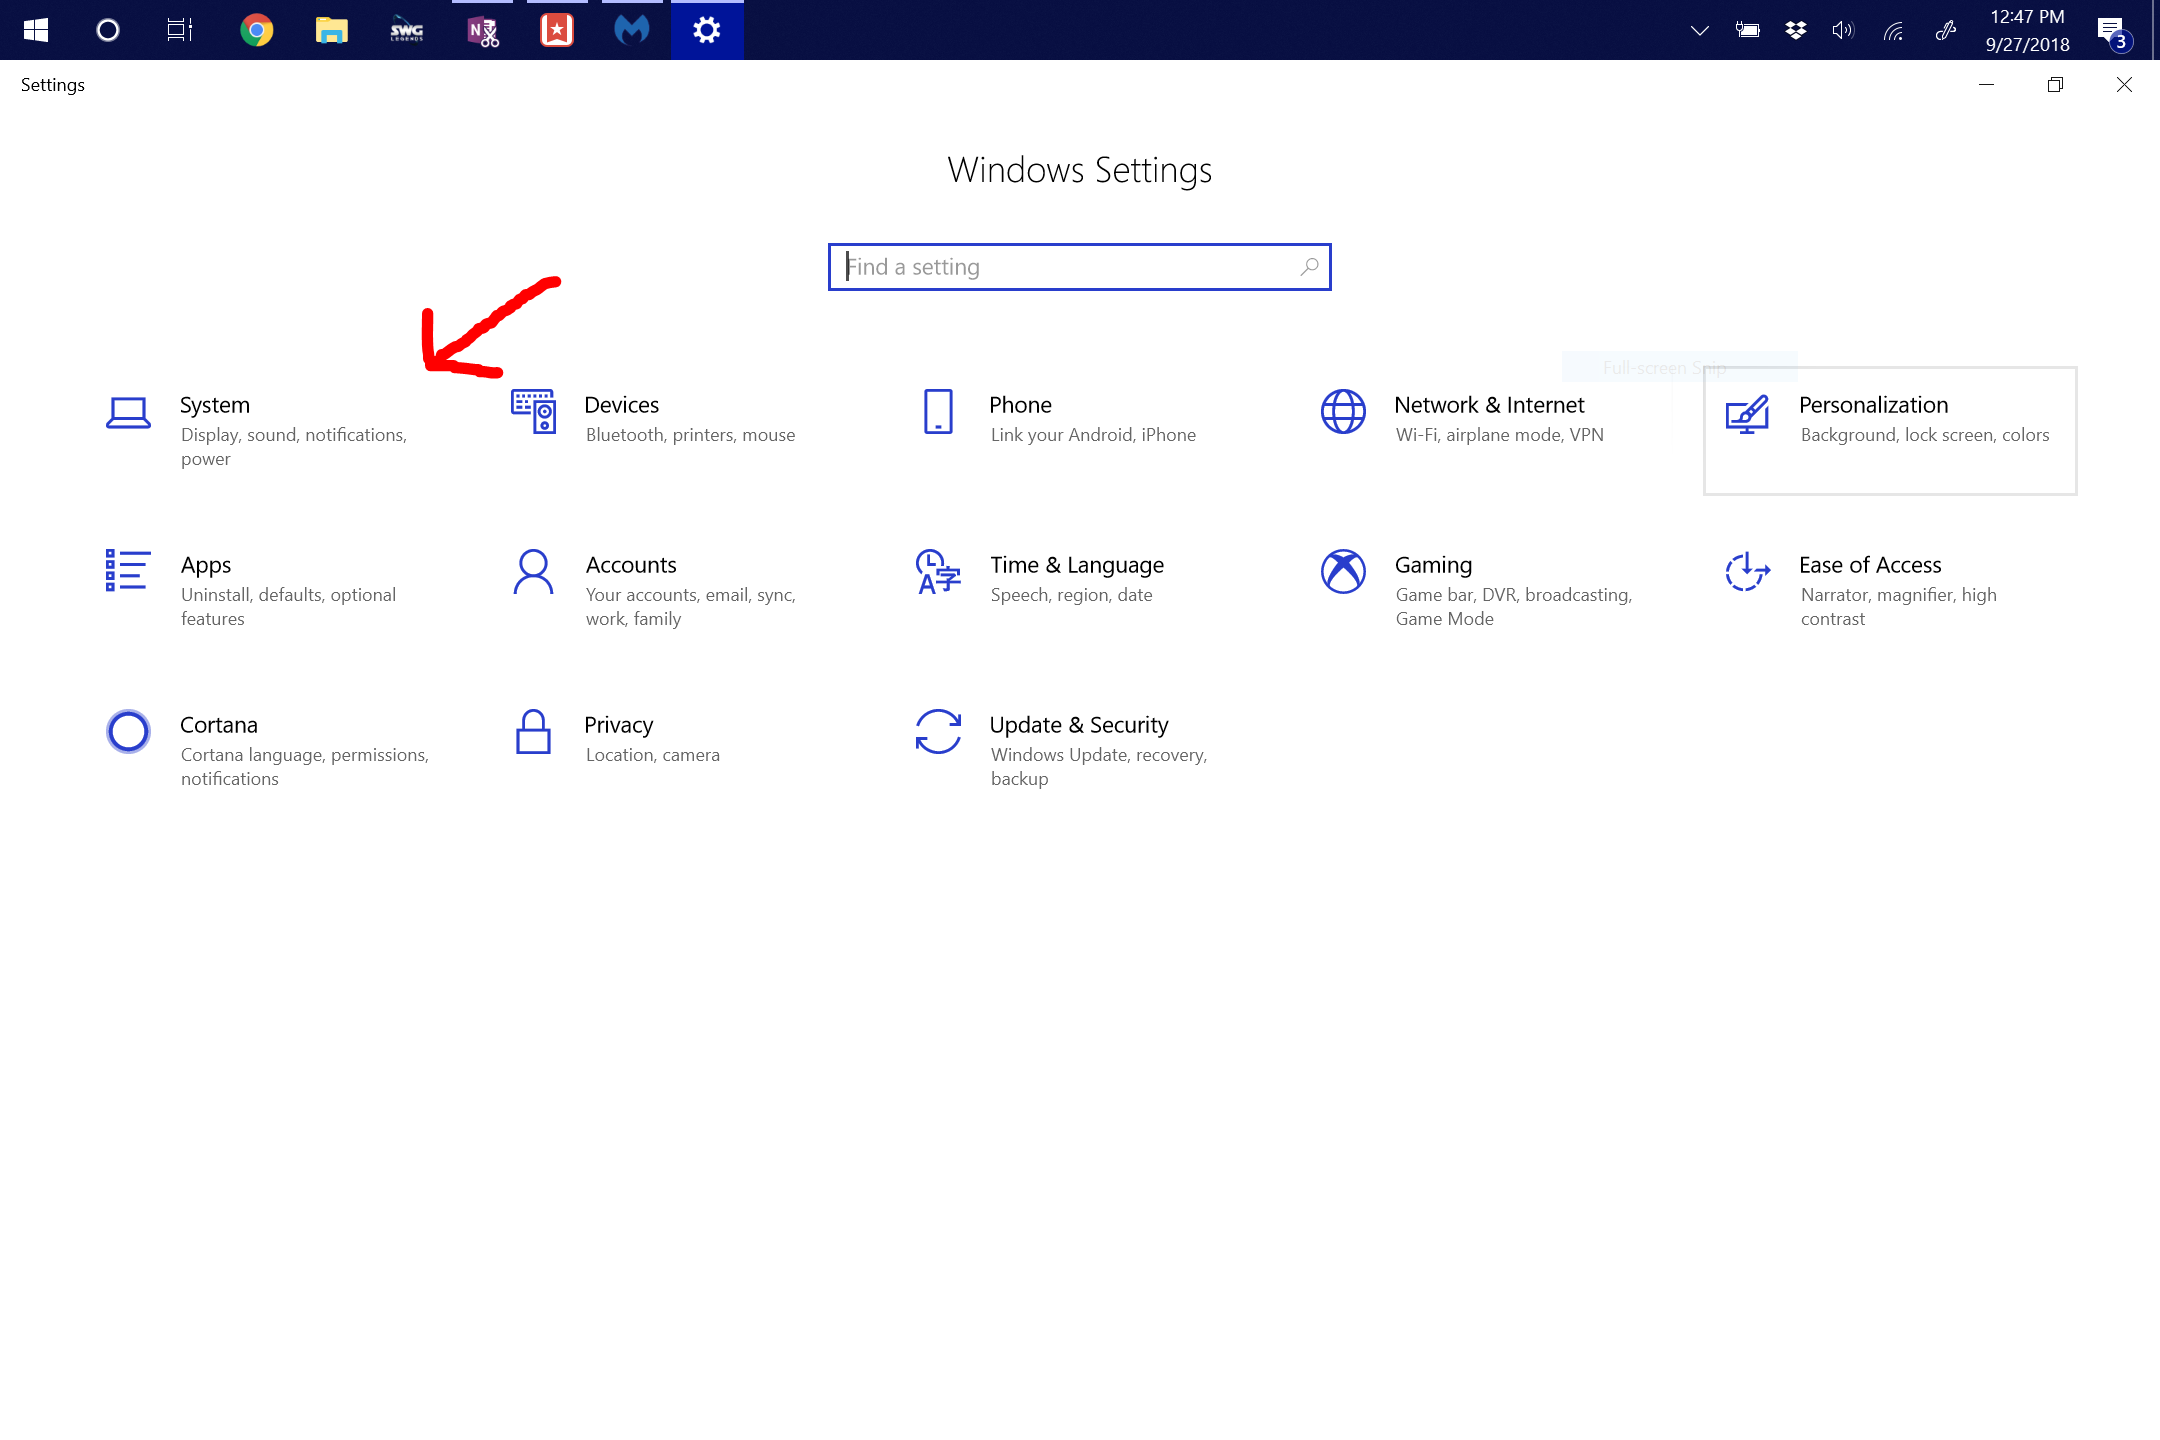
This opens up our Windows Settings App. In the Settings App, we want to click on System. It should be the first option.
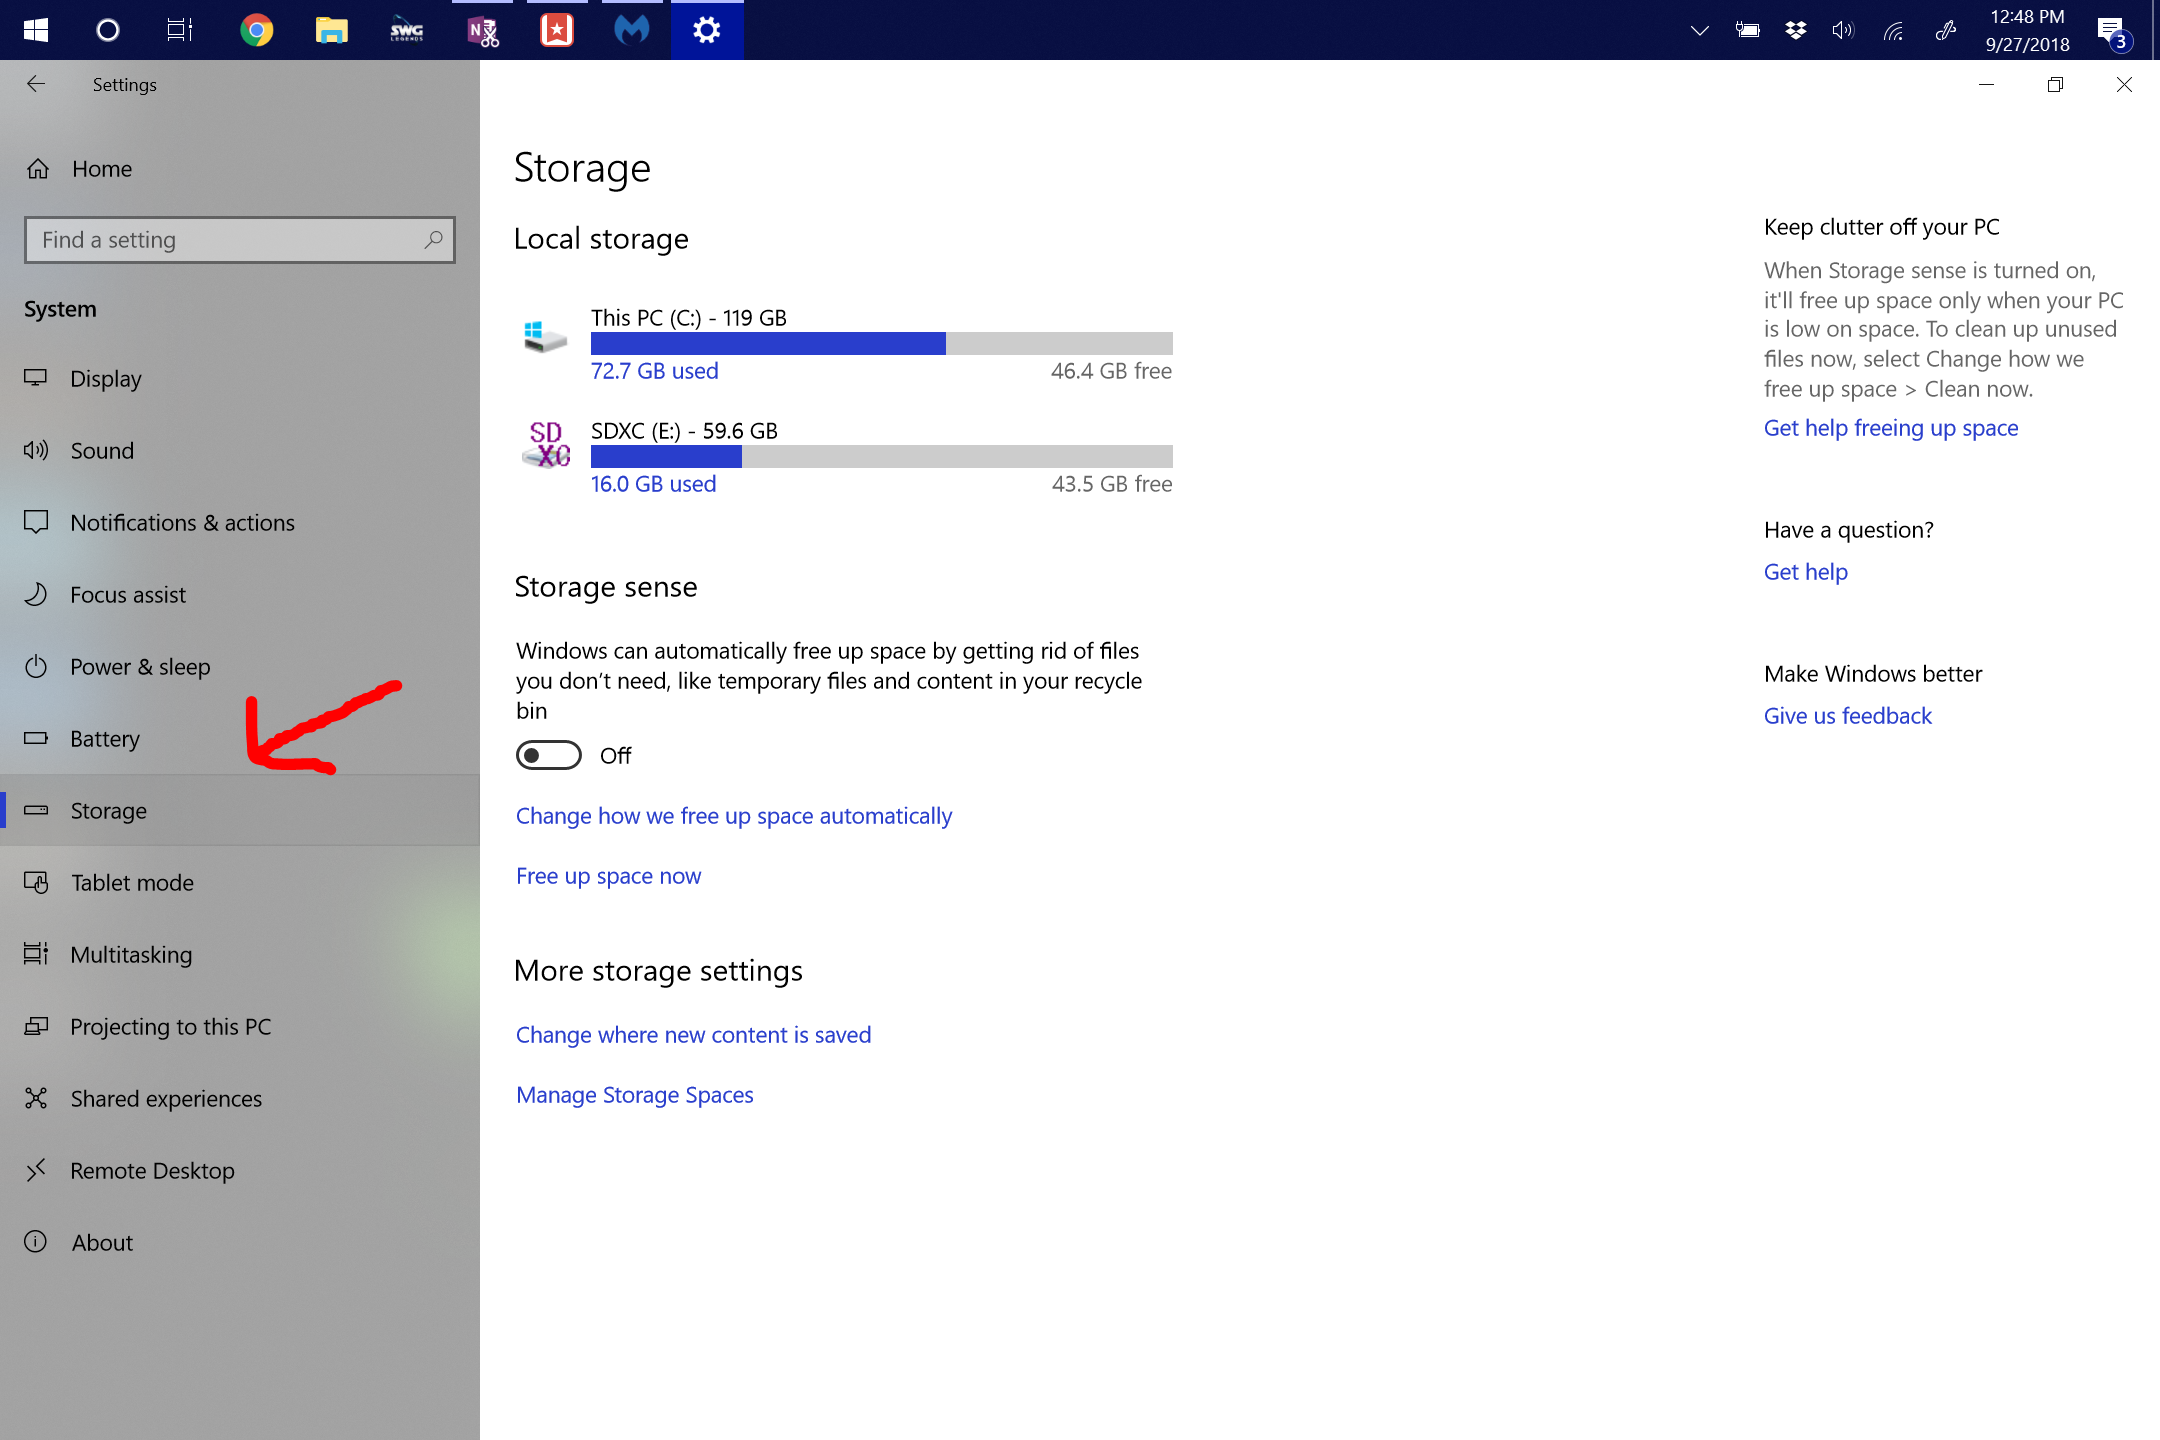
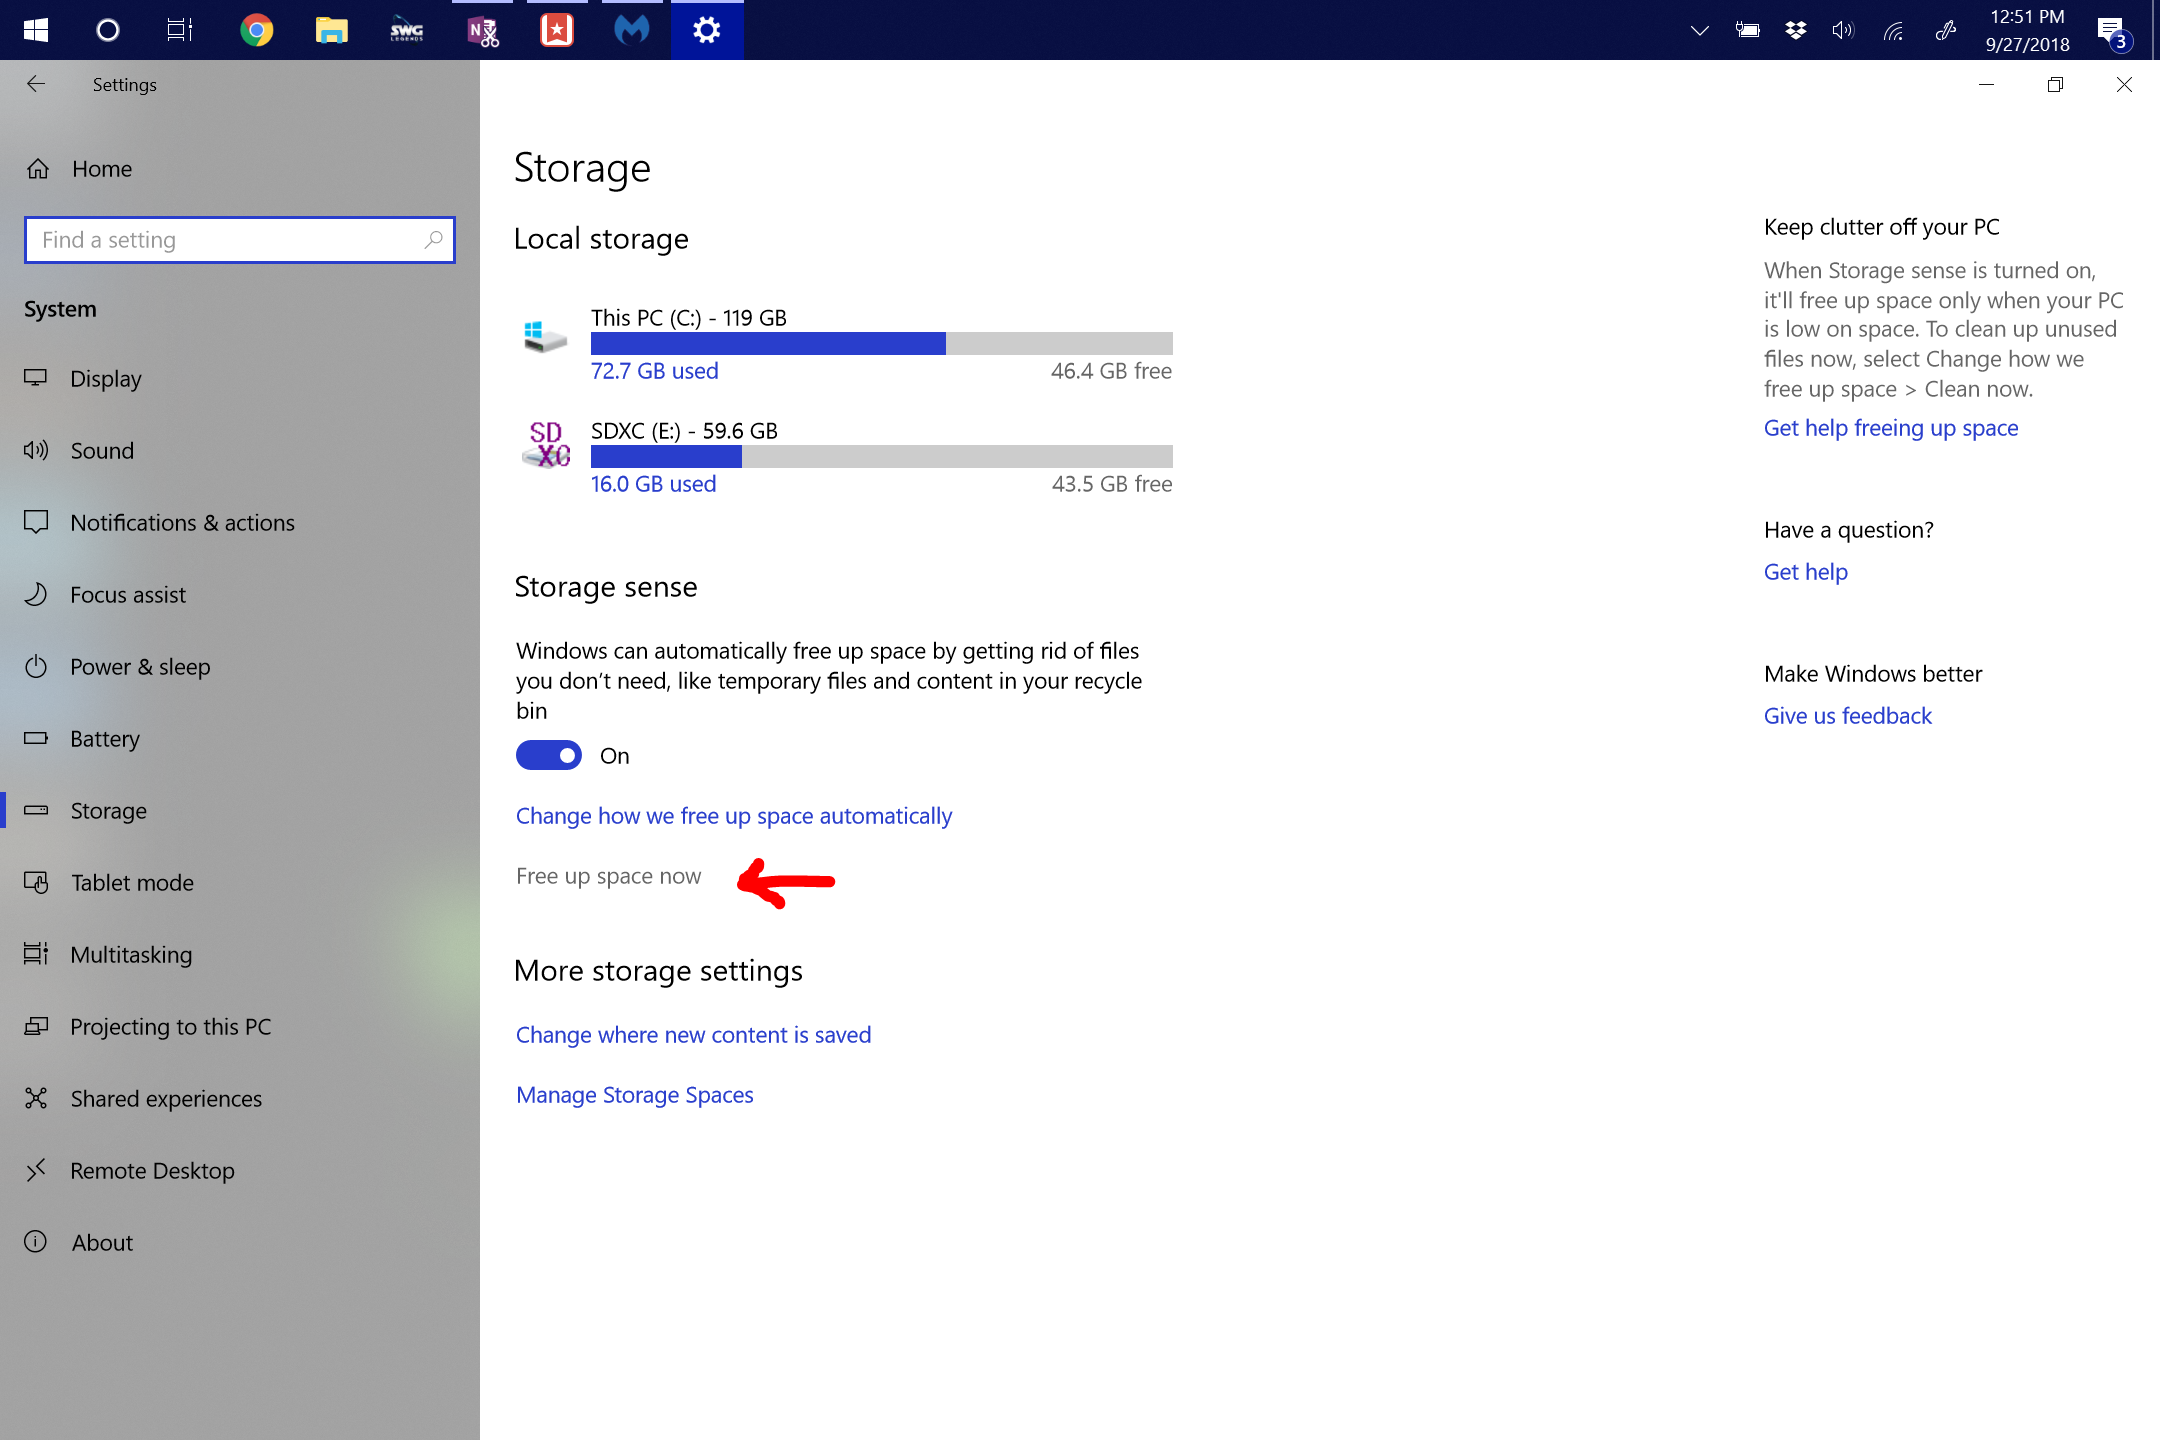
Then we want to find the Storage section on the list on the left-hand side of our screen.
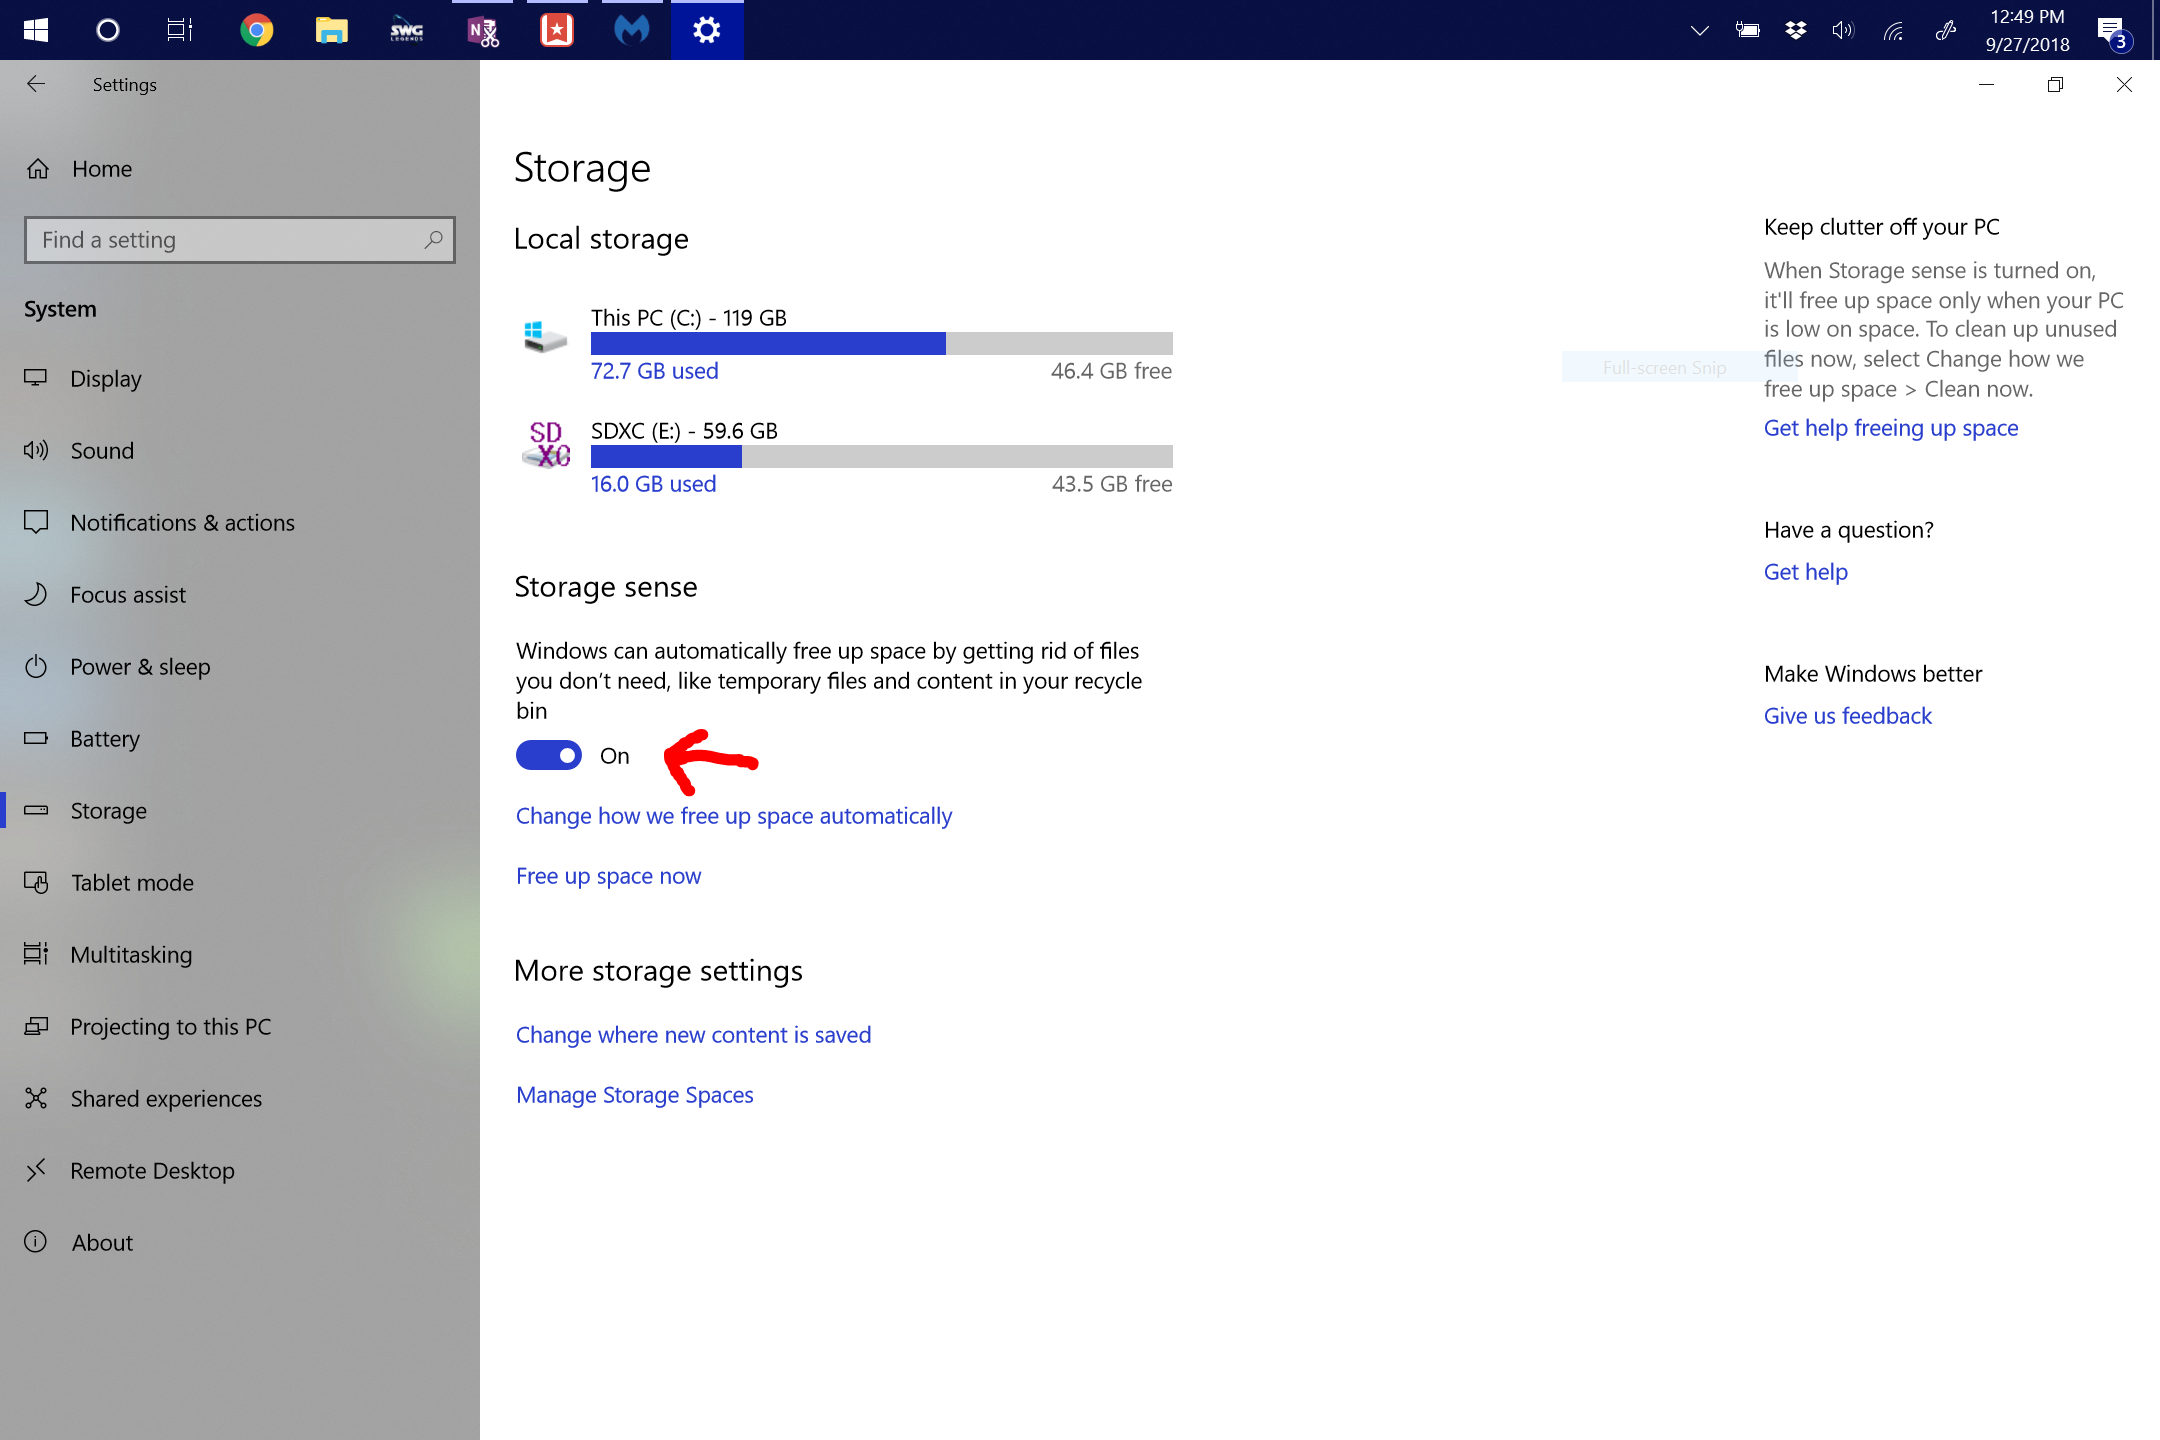
Now, underneath a listing of the drives in our PC we will see Storage Sense. You’ll want to make sure that that toggle is On. This option allows Windows to automatically free up space for you. It will delete some temporary files and empty the Recycle Bin once every 30 days. This will go a long ways to keeping space available on your Hard Drive.
Once we have Storage Sense turned on, we can go ahead and free up some space right now. Let’s click on ‘Free up space now.’
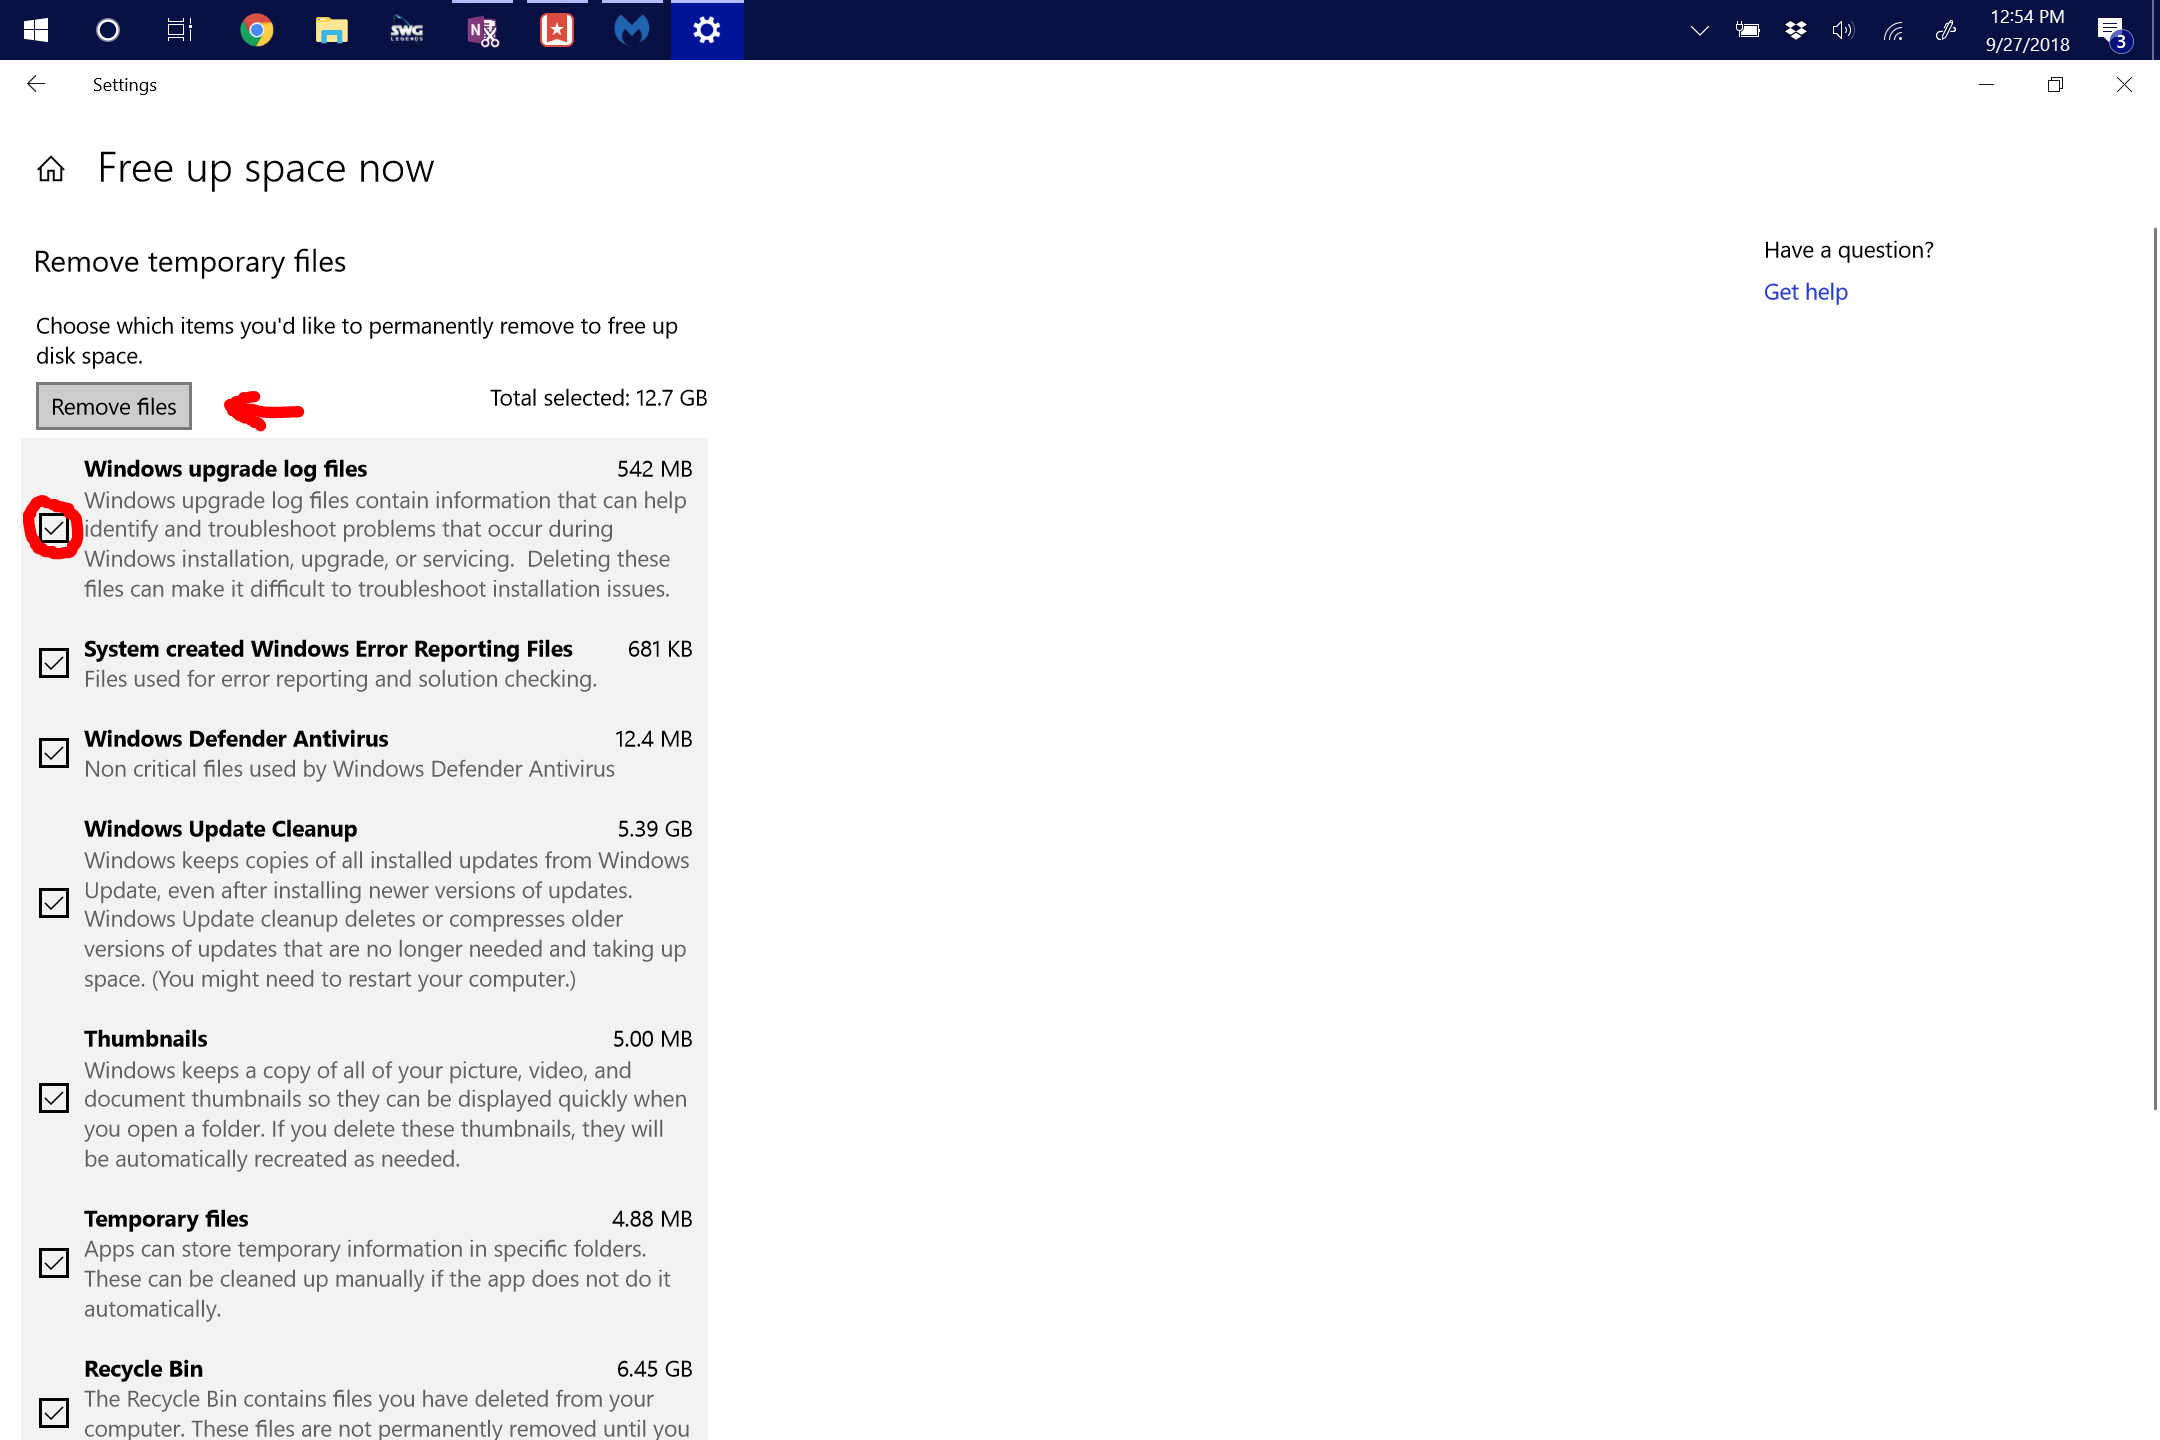
Windows might take a few minutes to calculate how much space it can free up here, so just hang tight until it finishes. Then you’ll want to go down the list and add a check mark next to all the boxes you want Windows to delete. I went ahead and checked them all off as there isn’t anything in there that we need to keep. Once you’ve checked everything off, click on ‘Remove files.’
And that’s it! I gained about 13 GB of Hard Drive (SSD in my case) space. This should give me enough space for the October 2018 Windows Update so that my PC can gain new features and stay secure.
If you need help with this process Y-Not Tech Services can do it for you. Contact Us to set up an appointment.


